This post contains affiliate links. This means that when you make a purchase, at no additional cost to you, I will earn a small commission.
… No, really, let this rhyme rest already.

I propose that we let these poems go. While they might seem like a great trick to get students to round small numbers there will, inevitably, be students who misunderstand, don’t remember the poem quite right, and, worst of all, DON’T ACTUALLY UNDERSTAND ROUNDING!!
Does the following conversation sound familiar?
Teacher: What is 42 rounded to the nearest ten?
Student: 30
Teacher: Tell me more about your thinking
Student: Well, my teacher last year said “5 or above, give it a shove, 4 or below, let it go” So that means you have to go down.
….
….
So you see the problem…
Teaching the skill of rounding is an excellent opportunity to help students to develop number sense, to earn command over their internal number line, and to understand scale and magnitude of numbers.
How to Teach Rounding WITHOUT Rhyming
The following is a protocol I have developed and have used with my students who are struggling with the skill of rounding. I would caution you that, if you would like to use this strategy, you start at the beginning and don’t skip a single step. This year I have used this protocol with both 4th and 5th grade students and, although the first few steps seem easy, they aren’t necessarily and you will learn A LOT about your students!

Step #1: Numbers 0 – 10
On tiles, write the numbers from zero to ten. You will also need a “game board” with 11 spaces.
Start by giving your students the tiles for 0 and 10 guiding them to put these numbers in the first and last spaces.
As students work their way though this activity, you will give them 1 tile at a time modeling the thinking about where a tile may be placed but encouraging students NOT to count the spaces.
The purpose of the spaces is to help students to see the even spacing between numbers. Have you ever seen a student working with an unhashed number line pointing and counting the line in a way which does NOT reflect understanding of scale? This step helps students to gain an understanding of this spacing.
I have done the next step in a number of different ways. Sometimes I give students the 5 to see where they may place the number. Sometimes, I flat out tell the students the 5 will be in the middle and allow them to see and use that pattern moving forward. Sometimes, I give them tiles that work from the outside in and then we discuss the number that falls in the middle later. You can use whichever method works for you. Each has their merits at various times.
Last, I give students the other tiles one at a time saying things like “If you know where the 5 goes, you can figure out where the 4 goes”. This gets students thinking about the relationship between numbers on a number line rather than counting the spaces.

Step #2: Numbers 0-10 On A Number Line
This step is almost identical to the first step. You are using the same tiles, 0-10, you are going about the process in a similar order, the only change is that students are placing the tiles on a number line rather than on the game board.
When I go through this step, we usually “play” 2-3 times. The first time though, I don’t usually say too much. I can tell you that it is likely that students will put the tiles much too far apart, close together, and in the wrong places on the number line.
As I see students make changes to their arrangement as they get more and more tiles, I ask questions so that they can verbalize their thinking. For example, a student who left room between the 4 & 5 will eventually have to push them together to make room for the other numbers. When they do this, or make other changes, I ask questions like:
“What made you push those numbers closer together?”
“Why don’t you need any space between those numbers?”
“What made you put space between those numbers?”
“How did you know how much space to leave?”
As I mentioned above, we usually repeat this sequence a few times. You will find your students become more accurate as you go!
Intermediate teachers, please, please, pretty please, do not skip these first two steps. Although you are working with numbers to 10 this will give you a lot of information about your student’s abilities with number lines and scale.

Step #3: Numbers 0-100 Counting by 10
At this point you will need to move back to the original “game board” configuration along with tiles for the numbers 0-100 counting by 10.
You will follow the same steps you followed in step one, however, this time, students are skip counting by 10s from 0 to 100.
I generally find that students do quite well on this activity after noticing the patterns from 1-10.
You will notice that I have used different colored tiles for numbers to 10 and numbers to 100. This is purely a materials management preference. I usually do this activity in a small group of 2-3 students at a time. I place all of the tiles for each student in a cup. It is then very easy to get out the tiles I need without having to go through and make sure that I have the right set.
After students have laid the tiles out on a game board, as before, move to the number line. You may have to “play the number line game” a few times through but you will find that students are much more accurate when grounded in the numbers 0-10 activity.
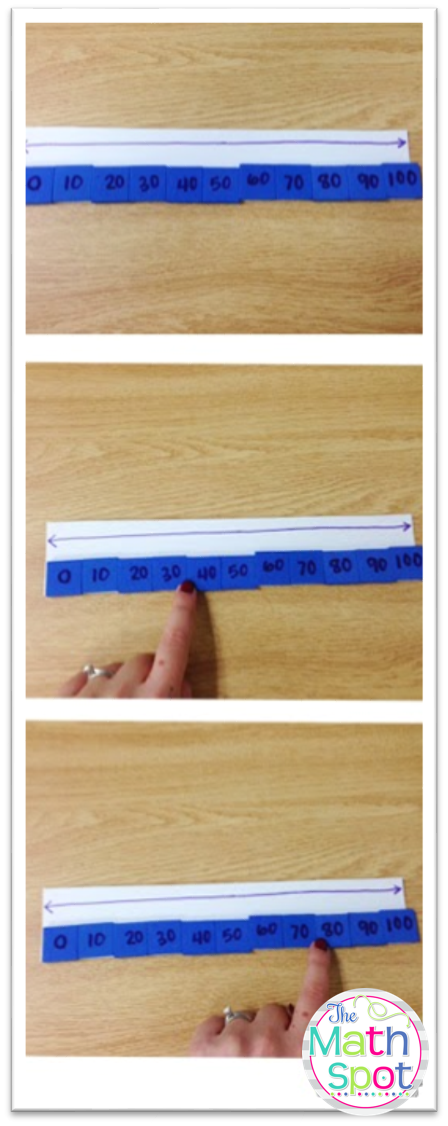
Step #4: Looking for Hidden Numbers
When students have laid out all of the tiles from 0-100, have students go looking for “hidden numbers”.
I will tell students “Between which two tens would you find the number….” we start out slowly at first but as students realize that it is between the 10 in the number you say and the next ten up, they will move more quickly. I give them a LOT of examples, probably upwards of 15-20 examples coming quite rapid fire towards the end of the exercise.
It was at this point in the activity that the student in the scenario at the top of my post let me know what he had learned about when he should “round up” and “round down”. With his firm understanding based on the first few parts of the activity, he quickly realized his error and was able to move forward- abandoning his rhyme about rounding.

Step 5: Zooming In
At this point, the activity still doesn’t really feel like you are teaching rounding. That’s ok, it’s all about to come together and pay off in a big way!
Teacher: Between which two tens would you find 34
Student: Between 30 and 40
Teacher: Here are tiles for the numbers 30-40. I will give them to you one at a time as I did before and I want you to do your best to put each number in the correct space the FIRST time, without sliding your tiles around. Think about what you know, the distance between numbers, and you will be fine!
Student: {Easily places tiles for #s 30-40}
Teacher: Which number is directly in the middle of 30 and 40?
Student: 35
Teacher: Good, let’s push the 35 up a bit so we can see that mid point. Now, the number 34. Which ten is it closer to?
Student: 30!
Your student will get even that first question right a vast majority of the time. I have seen it again and again and again. They understand the number line, they understand the scale of numbers, they understand the mid point and all of a sudden there is no need for a riddle, poem or rhyme to help them to round. THEY UNDERSTAND.
Step #6: Ready to Round
In terms of next steps, you want to get your students away from the tiles and able to round on paper or even in their head.
I have developed a number of rounding games for my students that start to get to this piece. They are, basically, a way for students to practice rounding to the nearest 10 on a number line. Over and over and over.
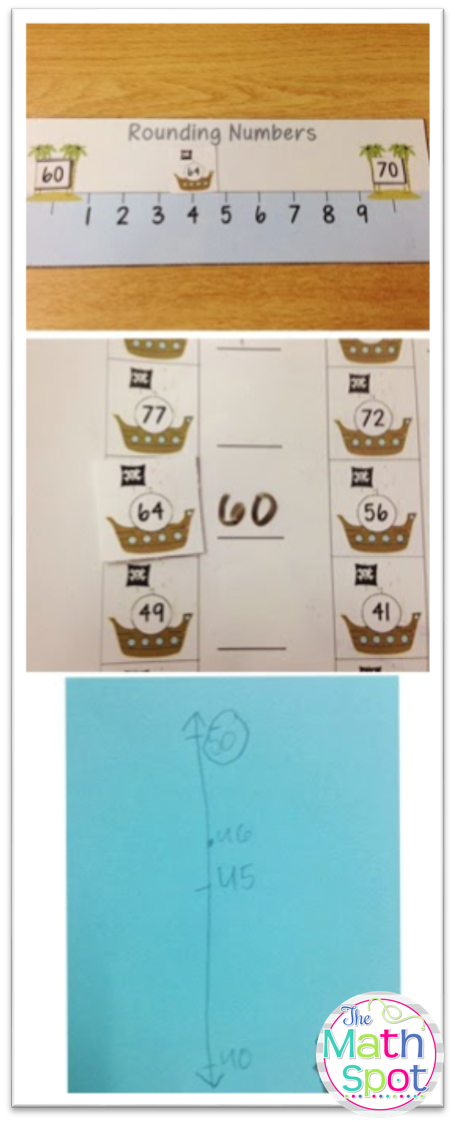
In this game, students pick out a pirate ship, determine the two closest tens (at first, I leave out the 10-100 number line to help, later they won’t need it) and then count on by one from the first ten to see where the ship lands. Students record their findings on a sheet I have slipped into a paper protector.
In a 30 minute lesson with 2 students, this is as far as I was able to get. They were able to complete about 5-6 examples before their time was up. The very cool part was that, just before they walked out the door, I showed them a few pirate ships and asked if they could solve the problem in their head and, with minimal subvocalizing… “54 is between 50 and 60, but it’s closer to… 50!” …they were able to do it!
Another next step is to move away from ANY manipulatives or game boards and to have students draw their own number line to round. The picture to the left is the work of the student who, just one day before, told me that 42 was between 30 and 40.
Related Resources: